VisItVisIt is a free interactive parallel visualization and graphical analysis tool for viewing scientific data on Unix and PC platforms. Users can quickly generate visualizations from their data, animate them through time, manipulate them, and save the resulting images for presentations. VisIt contains a rich set of visualization features so that you can view your data in a variety of ways. It can be used to visualize scalar and vector fields defined on two- and three-dimensional (2D and 3D) structured and unstructured meshes. VisIt was designed to handle very large data set sizes in the terascale range and yet can also handle small data sets in the kilobyte range. While VisIt is capable of operating in several modes we strongly recommend (and only support) client/server mode where the client is local and batch mode through VisIt's command line interface. We will describe these methods below. Client/Server Mode in VisItVisIt's client/server mode will require the installation of VisIt client software on a local workstation or laptop. There are precompiled binaries for Windows (exe installer), MacOS X(dmg), and Unix which can be downloaded here. The download page also contains detailed installation instructions. NCSA will support several versions of VisIt; for a list of current available versions, enter the following at a Blue Water's prompt:
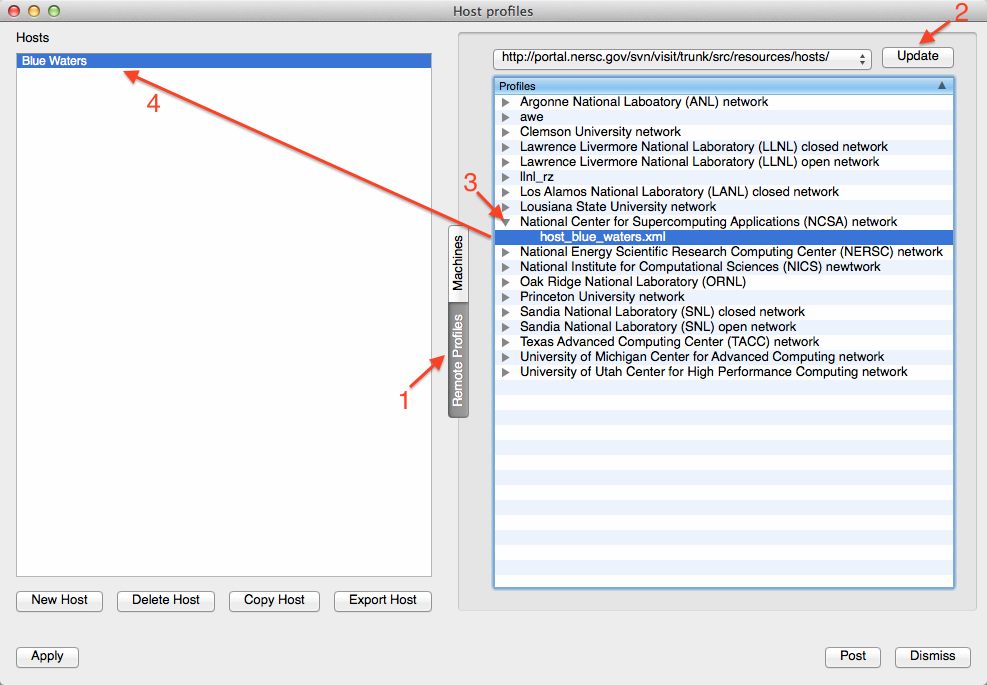
You must use a client on your laptop that matches at least the minor version number to be able to connect to Blue Waters and start a remote session, VisIt will hang while staring the metadata server otherwise. For example versions To connect a client to Blue Waters and start a remote session you need a Blue Waters "host profile." A host profile contains the information VisIt uses to launch parallel server software at a remote location. Below we will show how to load a Blue Waters host profile or create one by hand.
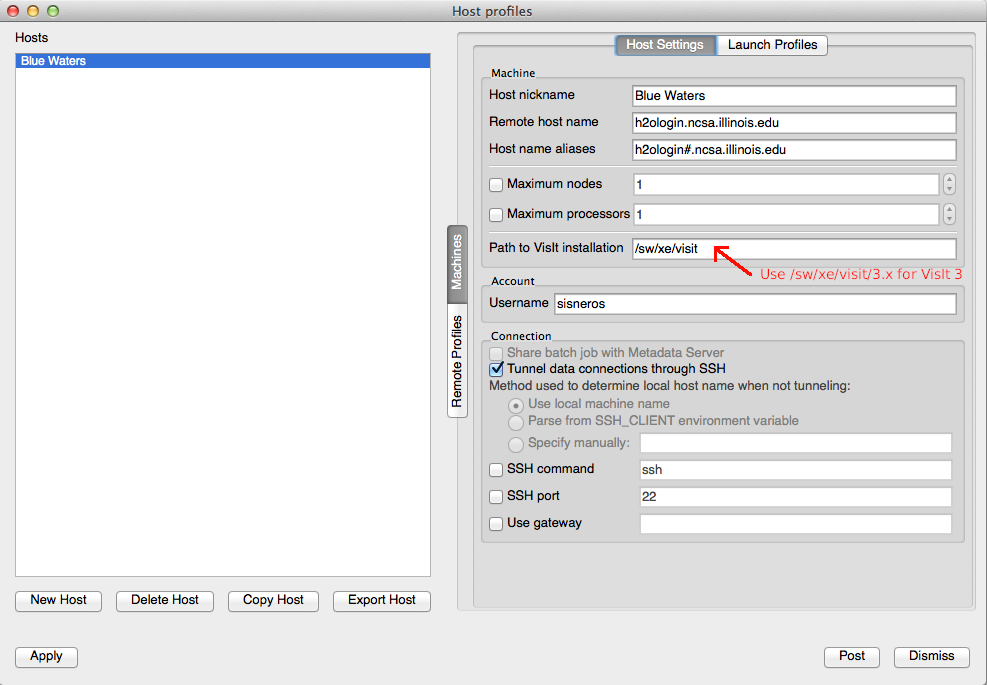
Note: this profile contains general settings and should work as-is, but could likely be better tailored to specific requirements/preferences. We therefore recommend at least awareness of the settings shown below. To make sure this profile is available the next time you load VisIt, use "Save Settings" from the Options pulldown. In fact, it is necessary to save settings to make any customization in VisIt persist beyond a current session. We will now show the relevant information to set up a host profile by hand.
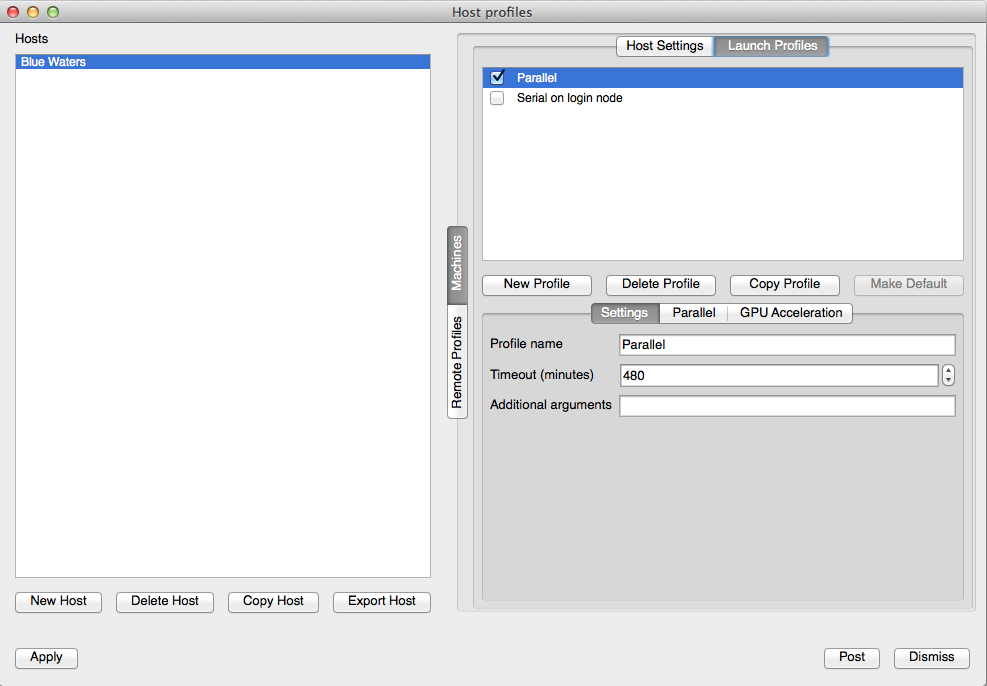
Note: Adding another profile is done with the "New Profile" button. Beyond renaming, this was the only step necessary to create the serial launch profile.
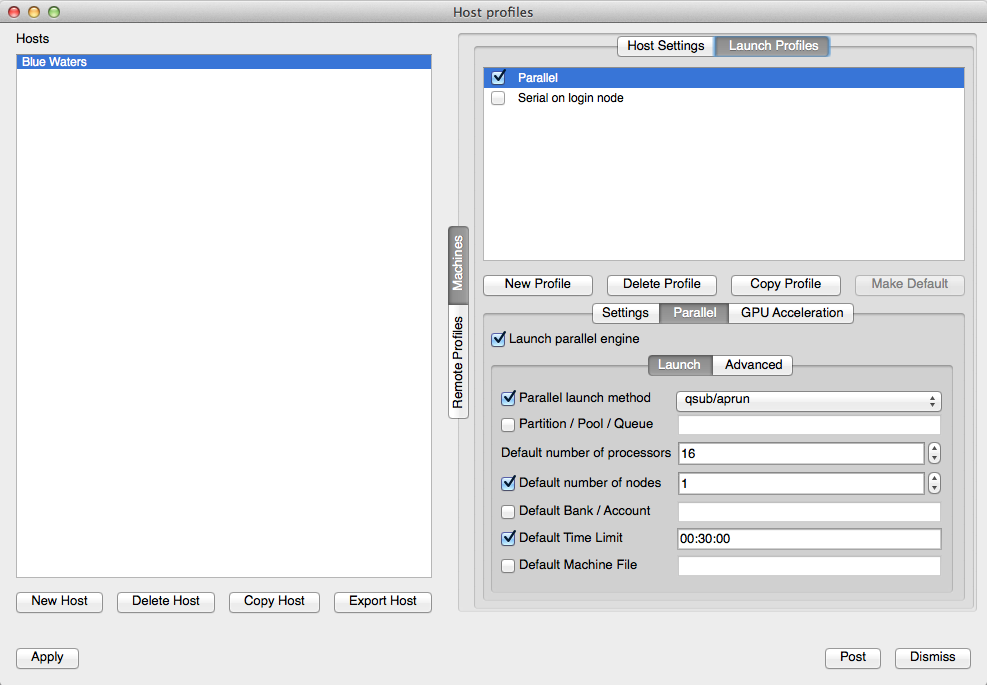
Queue: sets Note: it may be useful to use the debug queue in 30 minute blocks for exploratory/refinement tasks. Note: A user associated with multiple allocations should be especially careful to set Account correctly. Reminder: to ensure a profile is available the next time you load VisIt, use "Save Settings" from the Options pulldown. It is necessary to save settings to make any customization in VisIt persist beyond the current session. For Beginners: A Client/Server Quick Start to Seeing DataVisIt works by allowing a user to specify an execution pipeline in which a series of operations are applied to a dataset and the results are plotted into the viewer (the large window). The following is a series of steps to accomplish this basic VisIt task.
Visit's Command Line Interface and Batch ModeVisIt's command line interface (or CLI) is a Python-based, alternate interface to driving VisIt. The CLI can be started from the GUI by selecting "Command" from the Controls pulldown menu. Alternately, from the prompt on Blue Waters:
If VisIt starts directly from the command line, a script may be sourced with the "-s" flag and a script name, as in
Another important command line option to transition to full batch mode is "-nowin", as in
Finally, the script should be submitted to the Blue Waters job queue, and executed across compute nodes. The following is the batch script that has VisIt execute the above Python script (run with
As per usual with a batch script, the #PBS comments define qsub's arguments and in this case creates a job named visit_test to be run on 16 processors (ppn) on a single node. VisIt then manages the deployment of its parallel engine; "-l aprun" instructs VisIt to launch the engine with the aprun command. The arguments for aprun are determined through the specification of the number of processors (np) and the number of nodes (nn). Note: this script will only work for versions of VisIt 2.7.2 and newer. Earlier versions, with regard to aprun, treated "-nn" as processors per node rather than number of nodes. That is, in the above case the VisIt command would be changed to include "-np 16 -nn 16". Result of running the above scripts. Additional Information / References | |||||||||||||||||||||||||||||||||||||||||||||||||||||||
Skip to Content


Blue Waters User Portal
Sign In


Blue Waters is supported by the National Science Foundation (awards OCI-0725070 and ACI-1238993) the State of Illinois, and the National Geospatial-Intelligence Agency.
Contact Blue Waters Team with questions regarding this page.
Copyright 2024 Board of Trustees of the University of Illinois. All rights reserved. Web privacy notice.